
There’s something magical about slicing into a perfectly cooked chicken breast that’s golden on the outside and impossibly juicy on the inside. This garlic butter chicken breast recipe delivers exactly that—tender, flavorful chicken that’s anything but boring. Whether you’re rushing through a busy weeknight or planning a simple yet impressive dinner for guests, this recipe comes together in under 30 minutes with minimal fuss and maximum flavor.
What makes this dish truly special is the rich, aromatic garlic butter sauce that coats each piece of chicken. As the butter melts and mingles with fresh garlic, it creates a silky, fragrant sauce that seeps into every bite. The chicken develops a beautiful golden crust while staying incredibly moist and tender inside—no dry, rubbery chicken here. The aroma alone will have everyone gathering in the kitchen, drawn by the irresistible scent of sizzling butter and caramelized garlic.
This versatile recipe works beautifully for meal prep, date night, or family dinners. Serve it alongside roasted vegetables and creamy mashed potatoes for a comforting meal, or slice it over a crisp Caesar salad for something lighter. The simple preparation means you’re not stuck in the kitchen all evening, yet the results taste like you’ve spent hours perfecting every detail. It’s the kind of recipe that becomes a regular rotation in your weekly menu—reliable, delicious, and endlessly adaptable to whatever you’re craving.
Why You’ll Love This Recipe
- Ready in 25 minutes – From pan to plate faster than ordering takeout, making it perfect for hectic weeknights when you need dinner done quickly.
- Restaurant-quality flavor at home – The garlic butter sauce rivals anything you’d get at your favorite steakhouse, without the hefty price tag or reservation wait times.
- Foolproof technique – Even cooking beginners can nail this recipe thanks to simple steps that guarantee juicy, never-dry chicken every single time.
- One-pan wonder – Less cleanup means more time relaxing after dinner, with just one skillet to wash instead of a sink full of dishes.
- Meal prep friendly – Make a batch on Sunday and you’ve got protein ready for salads, grain bowls, and quick lunches all week long.
- Naturally gluten-free and low-carb – Fits seamlessly into various dietary preferences without sacrificing any of the incredible flavor.
Ingredients Explained
Understanding what each ingredient brings to the table helps you appreciate why this simple recipe tastes so incredible.
Chicken breasts form the foundation of this dish, providing lean protein that cooks quickly and absorbs all those delicious flavors. Look for breasts that are similar in size so they cook evenly—nobody wants one piece overdone while another is undercooked.
Butter is where the magic happens. It creates a luxurious sauce, helps achieve that golden-brown crust, and carries all the garlic flavor beautifully. Using real butter (not margarine) makes a noticeable difference in both taste and texture.
Garlic brings aromatic depth and savory complexity that transforms simple chicken into something crave-worthy. Fresh garlic cloves are essential here—the jarred stuff just doesn’t deliver the same punchy, fragrant flavor.
Olive oil is mixed with butter to prevent burning while getting a great sear on the chicken. It also adds a subtle fruity note and helps the chicken develop that gorgeous golden exterior.
Seasonings like salt, pepper, and paprika build layers of flavor. Salt enhances the natural taste of the chicken, pepper adds gentle warmth, and paprika contributes a subtle sweetness plus that beautiful color.
Fresh herbs such as parsley or thyme brighten the dish and add a fresh, earthy element that balances the richness of the butter. They’re the finishing touch that makes the dish look and taste restaurant-worthy.
Chicken broth or white wine (optional but recommended) helps create more sauce and adds another flavor dimension. It deglazes the pan, picking up all those tasty browned bits stuck to the bottom.
Step-by-Step Tips
Getting chicken breast right is all about technique, and these tips ensure perfect results every time.
Pound the chicken to even thickness before cooking. This is the number-one secret to juicy chicken. Use a meat mallet or rolling pin to gently pound the thicker part of each breast so the whole piece is about ¾ inch thick. Even thickness means even cooking, which means no dry edges or raw centers.
Don’t skip the resting period after seasoning. Let the seasoned chicken sit at room temperature for 15-20 minutes before cooking. This takes the chill off the meat, helping it cook more evenly, and allows the salt to penetrate the surface for better flavor throughout.
Preheat your pan properly. A medium-high heat and a properly heated pan (give it 2-3 minutes) are crucial for that golden crust. If the pan isn’t hot enough, the chicken will steam instead of sear, and you’ll miss out on all that delicious caramelization.
Resist the urge to move the chicken once it hits the pan. Let it sit undisturbed for 5-6 minutes on the first side. This allows a proper crust to form. If you keep flipping or moving it around, you’ll end up with pale, steamed chicken instead of beautifully browned pieces.
Use a meat thermometer to take the guesswork out of doneness. Pull the chicken off the heat when it reaches 160°F internally—it’ll coast up to the safe 165°F while resting. This prevents overcooking, which is the main culprit behind dry chicken.
Let it rest after cooking for at least 5 minutes before slicing. This allows the juices to redistribute throughout the meat instead of running all over your cutting board. Tenting it loosely with foil keeps it warm during this crucial rest time.
Make extra sauce by adding a splash of broth or wine to the pan after removing the chicken. Let it bubble and reduce slightly, scraping up all those flavorful brown bits, then spoon this liquid gold over your plated chicken.
Substitutions & Variations
This recipe is wonderfully flexible and adapts easily to what you have on hand or your personal preferences.
Protein swaps: Chicken thighs work beautifully if you prefer darker meat—they’re even more forgiving and stay juicy with slightly longer cooking. Pork chops are another excellent option using the exact same method and cooking time.
Dairy-free version: Replace butter with ghee for a rich, buttery flavor that’s lactose-free, or use all olive oil if you need completely dairy-free (though the flavor will be lighter).
Different herbs: Swap parsley for fresh basil, rosemary, or oregano depending on your mood. Rosemary pairs especially well with the garlic for a more robust, earthy flavor profile.
Spice it up: Add red pepper flakes, cayenne, or a dash of hot sauce to the butter for a kick of heat. Or try blackened seasoning instead of paprika for a Cajun-inspired twist.
Lemon garlic version: Add fresh lemon juice and zest to the sauce at the end for a bright, tangy variation that’s perfect for spring and summer meals.
Creamy garlic chicken: Stir in a splash of heavy cream or cream cheese to the pan sauce for a luscious, restaurant-style cream sauce that’s absolutely divine.
Italian-style: Add Italian seasoning, sun-dried tomatoes, and finish with fresh mozzarella melted on top during the last minute of cooking.
Honey garlic twist: Drizzle a tablespoon of honey into the butter sauce for a sweet and savory combination that caramelizes beautifully.
Storage & Reheating
Proper storage keeps your chicken tasting fresh and delicious for days.
Refrigerator storage: Let the chicken cool completely, then store it in an airtight container in the refrigerator for up to 4 days. Keep any extra sauce in a separate small container so you can drizzle it over when reheating—it makes all the difference in maintaining that fresh-cooked taste.
Freezer storage: This chicken freezes beautifully for up to 3 months. Wrap each piece individually in plastic wrap, then place them all in a freezer-safe bag. This way you can grab just one or two pieces as needed. Label the bag with the date so you know when to use it by.
Thawing: Transfer frozen chicken to the refrigerator the night before you plan to eat it. Slow thawing in the fridge maintains the best texture and food safety. In a pinch, you can defrost it in the microwave using the defrost setting, but the texture won’t be quite as good.
Reheating in the oven: This is the best method for maintaining juiciness. Preheat your oven to 350°F, place the chicken in a baking dish, add a tablespoon or two of broth or water, cover with foil, and heat for 15-20 minutes until warmed through.
Reheating on the stovetop: Slice the chicken first, then warm it in a skillet over medium-low heat with a little butter or broth. This takes just 3-4 minutes and keeps the meat moist while refreshing that garlic butter flavor.
Microwave reheating: If you’re short on time, microwave on 50% power in 30-second intervals to avoid tough, rubbery chicken. Add a damp paper towel over the plate to create steam and prevent drying out.
Meal prep tip: Store the chicken unsliced if possible—it retains moisture better as a whole piece. Slice it fresh when you’re ready to eat for the juiciest results.
Serving Ideas
This versatile chicken pairs beautifully with countless sides and turns into completely different meals depending on what you serve alongside it.
Classic comfort pairings: Serve with creamy mashed potatoes or garlic mashed cauliflower to soak up that luscious butter sauce. Add roasted green beans, glazed carrots, or sautéed asparagus for a complete, satisfying meal that feels like Sunday dinner any night of the week.
Light and fresh options: Slice the chicken over mixed greens for a hearty salad, or serve it with quinoa and a cucumber-tomato salad for a lighter Mediterranean-inspired plate. Steamed broccoli or a crisp arugula salad with lemon vinaigrette balances the richness perfectly.
Pasta perfection: Slice and toss with fettuccine, add some pasta water to the garlic butter sauce, and you’ve got an easy, restaurant-quality pasta dinner. Or serve whole alongside creamy risotto or buttery orzo for Italian-inspired comfort food.
Low-carb sides: Pair with cauliflower rice, zucchini noodles, or a simple caprese salad for a keto-friendly meal that doesn’t skimp on flavor. Roasted Brussels sprouts or blistered cherry tomatoes add colorful, nutritious bulk.
Global flavors: Serve over cilantro-lime rice with black beans and avocado for Tex-Mex vibes. Or go Mediterranean with couscous, hummus, and a chopped salad with feta cheese.
Sandwich transformation: Slice and pile onto ciabatta rolls with fresh mozzarella, tomatoes, and pesto for incredible chicken sandwiches. It’s also perfect sliced thin for wraps with ranch dressing and crisp lettuce.
Beverage pairings: A crisp Chardonnay or Sauvignon Blanc complements the buttery richness beautifully. For non-alcoholic options, sparkling water with lemon or a light iced tea works wonderfully.
Print
chicken breast recipes
- Total Time: 25 minutes (plus rest time: 40 minutes total)
- Yield: 4 servings 1x
- Diet: Gluten Free
Description
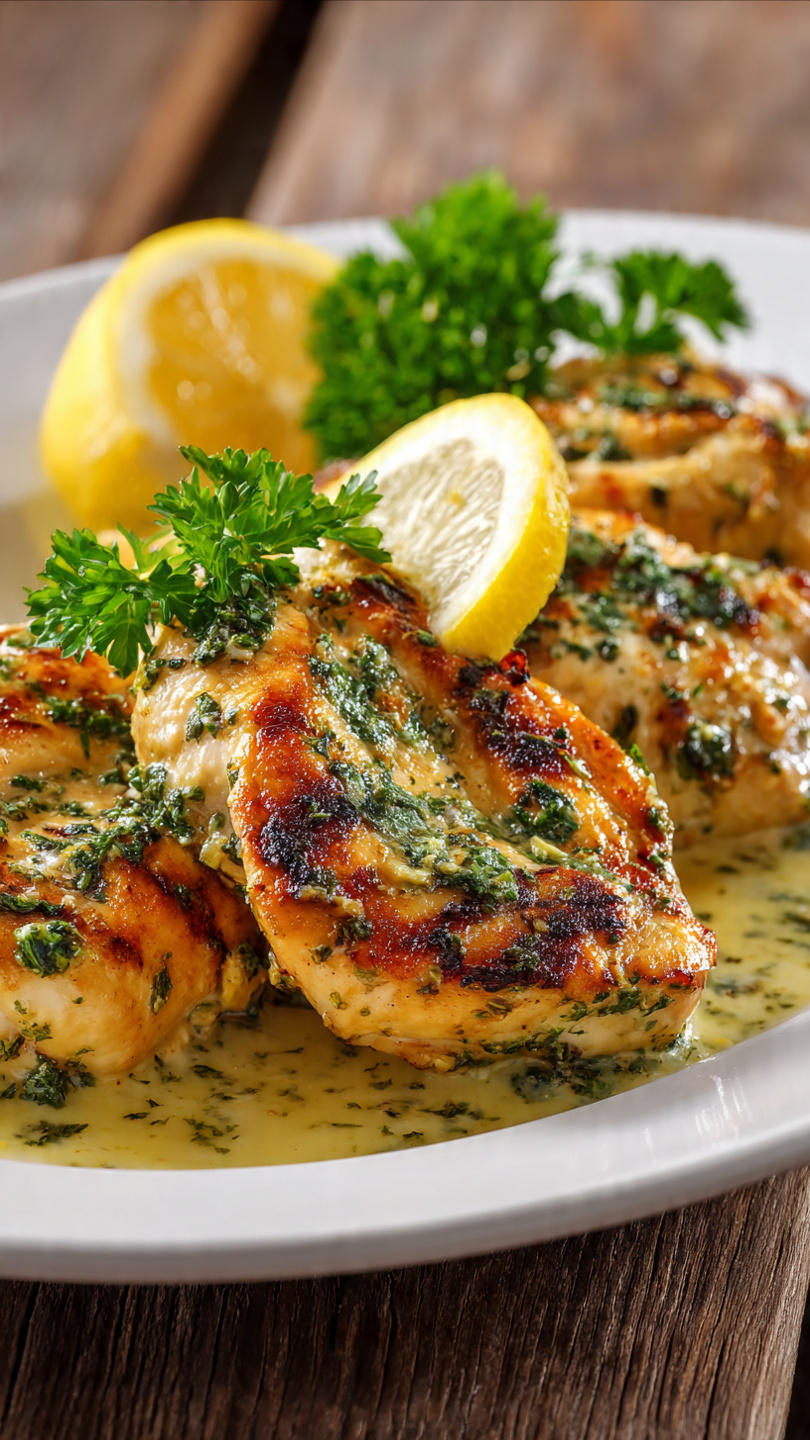
Perfectly juicy chicken breasts seared to golden perfection and coated in a rich, aromatic garlic butter sauce. This easy 25-minute recipe delivers restaurant-quality flavor with minimal effort—ideal for busy weeknights or elegant dinners.
Ingredients
- 4 boneless, skinless chicken breasts (about 6–8 oz each)
- 3 tablespoons butter, divided
- 2 tablespoons olive oil
- 6 cloves garlic, minced
- 1 teaspoon salt
- ½ teaspoon black pepper
- ½ teaspoon paprika
- ¼ cup chicken broth (or white wine)
- 2 tablespoons fresh parsley, chopped
- ½ teaspoon dried thyme (optional)
- Lemon wedges for serving (optional)
Instructions
- Prep the chicken: Pat chicken breasts dry with paper towels. If they’re uneven in thickness, place between plastic wrap and pound to an even ¾-inch thickness. Season both sides with salt, pepper, and paprika. Let rest at room temperature for 15 minutes.
- Heat the pan: In a large skillet, heat olive oil and 1 tablespoon butter over medium-high heat until the butter is melted and the pan is hot (about 2-3 minutes).
- Sear the chicken: Add chicken breasts to the pan without overcrowding. Cook undisturbed for 6-7 minutes until golden brown on the bottom. Flip and cook another 6-7 minutes until the internal temperature reaches 160°F.
- Rest the chicken: Transfer chicken to a plate and tent loosely with foil. Let rest for 5 minutes (temperature will rise to 165°F).
- Make the garlic butter sauce: Reduce heat to medium. Add remaining 2 tablespoons butter to the same pan. Once melted, add minced garlic and thyme. Cook, stirring constantly, for 30-60 seconds until fragrant.
- Finish the sauce: Pour in chicken broth (or wine), scraping up any browned bits from the bottom of the pan. Let simmer for 2-3 minutes until slightly reduced. Stir in fresh parsley.
- Serve: Return chicken to the pan and spoon the garlic butter sauce over top, or plate the chicken and drizzle with sauce. Garnish with additional parsley and lemon wedges if desired.
Notes
- Even cooking tip: Pounding chicken to even thickness is crucial for preventing dry, overcooked edges.
- Don’t overcook: Pull chicken off heat at 160°F—it will reach 165°F while resting.
- Sauce variations: Add a splash of heavy cream for creamy garlic sauce, or lemon juice for brightness.
- Storage: Store in an airtight container in the refrigerator for up to 4 days or freeze for up to 3 months.
- Reheating: Best reheated in the oven at 350°F covered with foil, or sliced and warmed in a skillet with a bit of broth.
- Prep Time: 10 minutes (plus 15 minutes rest time)
- Cook Time: 15 minutes
- Category: Main Course, Dinner, Entree
- Method: Pan-Seared, Stovetop
- Cuisine: American
Nutrition
- Serving Size: 1 chicken breast (approximately 6-8 oz with sauce)
- Calories: 340
- Sugar: 0g
- Sodium: 680mg
- Fat: 18g
- Saturated Fat: 7g
- Unsaturated Fat: 10g
- Trans Fat: 0g
- Carbohydrates: 2g
- Fiber: 0g
- Protein: 42g
- Cholesterol: 145mg
FAQs
How do I know when the chicken is done without a thermometer?
While a meat thermometer is the most reliable method, you can check by making a small cut in the thickest part—the juices should run clear, not pink, and the meat should be opaque white throughout. The chicken should feel firm but still have a little give when pressed. However, investing in an instant-read thermometer (they’re under $15) takes all the guesswork out and prevents overcooking.
Why does my chicken always turn out dry?
Dry chicken usually comes from overcooking or starting with uneven thickness. Make sure to pound your chicken to an even thickness, don’t cook past 165°F internal temperature, and always let it rest before slicing. Also, using medium-high heat instead of high heat gives you more control and prevents the outside from overcooking before the inside is done.
Can I make this recipe with frozen chicken breasts?
It’s best to thaw chicken completely before cooking for even results and proper browning. If you’re in a pinch, you can cook from frozen, but you’ll need to add 50% more cooking time and the chicken won’t develop the same golden crust. Thawing overnight in the refrigerator is always your safest bet for both food safety and texture.
What’s the best way to prevent the garlic from burning?
Add the garlic after you’ve seared the chicken, not before. Lower the heat slightly when you add it, and stir it constantly for just 30-60 seconds until fragrant. If the garlic burns, it becomes bitter and can ruin the dish. You can also add a splash of broth or wine immediately after the garlic to stop the cooking process.
My chicken sticks to the pan—what am I doing wrong?
Make sure your pan is properly preheated and you’re using enough fat (butter and oil). Don’t move the chicken too soon—it will naturally release from the pan once a proper crust forms, usually after 5-6 minutes. A good-quality stainless steel or non-stick pan also helps tremendously. Pat the chicken completely dry before seasoning to prevent steam, which causes sticking.
Can I double this recipe for a crowd?
Absolutely! However, don’t overcrowd the pan or the chicken will steam instead of sear. Cook in batches if necessary, keeping finished pieces warm in a 200°F oven while you cook the rest. The garlic butter sauce can easily be doubled and made all at once at the end in the same pan after all the chicken is cooked.


