
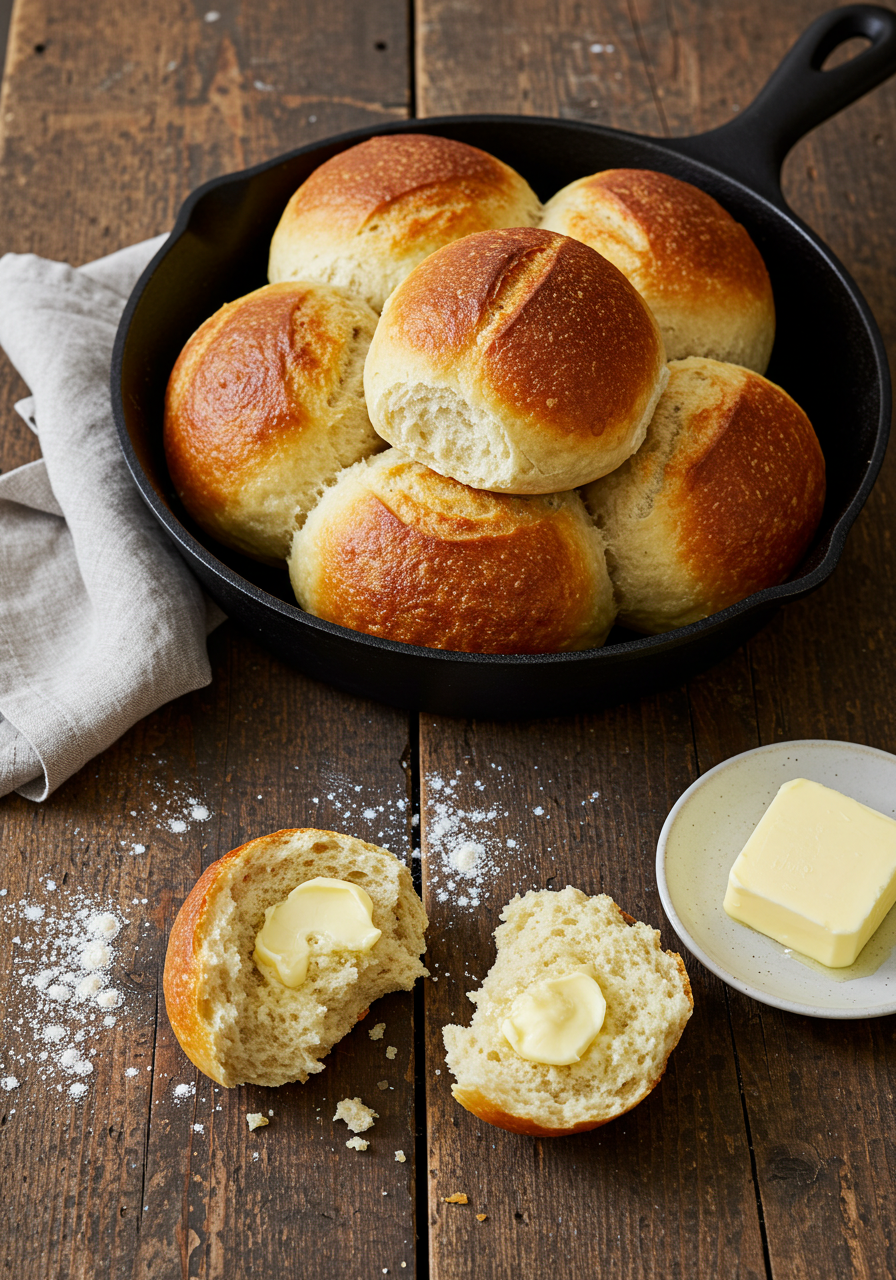
Picture this: you break open a warm, golden-brown dinner roll and watch steam rise as the soft, pillowy interior reveals itself. The gentle tang of sourdough mingles with the rich, buttery aroma, creating that perfect balance that makes your mouth water instantly. This sourdough dinner rolls recipe delivers exactly that experience – and it’s easier than you think!
I know what you’re thinking. Sourdough can be intimidating, right? All that chatter about finicky starters, drawn-out fermentation, and uncertain outcomes. But here’s the thing – I’ve spent years perfecting this easy sourdough dinner rolls recipe, and I’m about to share all my secrets with you.
What makes this recipe special? These rolls are incredibly soft and fluffy, with just the right amount of sourdough tang. They’re beginner-friendly (yes, even if you’ve never worked with sourdough before!), and you can adapt them for overnight proofing to fit your schedule. Whether you’re using an active starter or sourdough discard, I’ve got you covered.
By the end of this guide, you’ll know exactly how to make sourdough rolls that rival any bakery. You’ll master the techniques for achieving that perfect texture, learn foolproof shaping methods, and discover timing tricks that work with your lifestyle. Plus, I’ll share troubleshooting tips so you can avoid common pitfalls.
Ready to fill your kitchen with the most amazing aroma and your table with the softest, most delicious dinner rolls? Let’s get baking!
Why This Sourdough Dinner Rolls Recipe is Game-Changing
Unparalleled Softness & Fluffiness
The secret lies in my technique combining enriched dough (thanks to milk, butter, and a touch of sugar) with proper fermentation timing. Milk proteins lend tenderness, while the sourdough starter builds structure and depth of flavor without sacrificing that soft, pillowy texture.
Perfect Tang Balance
Through optimal fermentation timing, these rolls achieve that signature sourdough flavor without being overpowering. The tang is gentle and pleasant – perfect for dinner rolls that complement rather than compete with your meal.
Beginner-Friendly Approach
Even if you’re new to sourdough baking, this recipe sets you up for success. I’ve included clear visual cues, timing guidelines, and detailed explanations for each step. No guesswork required!
Flexible Schedule Options
Life gets busy, and your baking should adapt. This recipe offers both same-day and overnight proofing options, so you can prep these rolls around your schedule.
Incredible Versatility
These rolls are perfect for everyday dinners, holiday gatherings, or even as the base for amazing sandwiches. They freeze beautifully too, so you can always have homemade sourdough rolls on hand.
Ingredients You’ll Need
For consistently perfect results, I always recommend measuring ingredients by weight when possible. Quality matters here – good flour and fresh butter make a noticeable difference in your final rolls.
For the Dough:
- 100g active, bubbly sourdough starter (fed 4-8 hours prior)
- 240ml whole milk, room temperature
- 50g granulated sugar
- 500g bread flour (or all-purpose flour)
- 10g salt
- 60g unsalted butter, softened
For Assembly:
- 2 tablespoons melted butter (for greasing)
- Beat 1 egg with 1 tbsp of milk to use as an egg wash.
Active & Bubbly Sourdough Starter – This is Crucial! Your starter should have doubled in size and pass the float test (a small spoonful floats in water) within 4-8 hours of feeding. This ensures your rolls will rise properly and develop that perfect texture.
Sourdough Discard Option: If you prefer using discard, increase the amount to 150g and add ¼ teaspoon active dry yeast to help with leavening. The taste will be a bit milder, but just as tasty!

Equipment Essentials
Must-Haves:
- Stand mixer with dough hook (or large mixing bowl for hand kneading)
- Kitchen scale for accurate measurements
- Large mixing bowl
- Dough scraper or bench knife
- 9×13 inch baking pan
- Clean kitchen towels
Helpful Optional Tools:
- Bench scraper for easy dough handling
- Proofing box or oven with light on
- Instant-read thermometer
- Wire cooling rack

Step-by-Step Instructions: The Ultimate Guide to Soft Sourdough Rolls
Prepare Your Sourdough Starter
Start by ensuring your sourdough starter is active and ready. Feed it 4-8 hours before you plan to begin mixing your dough. You’ll know it’s ready when it has doubled in size and bubbles actively on the surface.

Float Test: Place a small spoonful of starter into a glass of water and see if it floats. If it floats, you’re good to go! If it goes under, wait another hour or two.

Mixing the Dough
In the bowl of your stand mixer (or a large mixing bowl), add the active starter, milk at room temperature, and sugar. Mix until everything is well incorporated—it’s fine if the mixture looks slightly lumpy at this point.
Add the flour and mix on low speed until a shaggy dough forms. Let this mixture rest for 30 minutes (this is called autolyse, and it helps develop gluten structure naturally).
After the rest, add the salt and softened butter. Mix on medium speed for 8-10 minutes until the dough is smooth, elastic, and slightly tacky but not sticky.

Hand Kneading Option: If mixing by hand, combine ingredients in a large bowl, then turn onto a lightly floured surface. Knead for 12-15 minutes until smooth and elastic. The dough should feel a little sticky but not cling to your hands.

Bulk Fermentation & Stretch and Folds
Place the dough in a greased bowl and cover with a damp towel. For the first 2 hours, perform stretch and folds every 30 minutes (4 sets total).
Stretch & Fold Technique: With wet hands, grab one side of the dough, stretch it up, and fold it over to the opposite side. Rotate the bowl 90 degrees and repeat until you’ve done all four sides. This builds strength without overworking the dough.

After the stretch and folds, let the dough continue rising until it increases by about 50% in size (typically 2-4 hours more, depending on your kitchen temperature).

Shaping the Rolls
Transfer the dough to a lightly floured surface and cut it into 12 equal portions (around 75g each—using a scale makes this much easier!).

Shaping Technique: For each piece, flatten slightly, then gather the edges toward the center. Flip seam-side down and cup your hands around the dough. Roll the dough in circular motions against the counter to build surface tension, forming a smooth, taut ball.

Place the shaped rolls in a greased 9×13-inch pan, leaving a little space between each so they have room to rise.

Second Proofing (Cold vs. Warm)
Option 1: Overnight Cold Proof (Recommended) Cover the pan tightly with plastic wrap and refrigerate overnight (8-24 hours). The slow fermentation enhances the flavor and allows for flexible timing. Allow it to rest at room temperature for 1–2 hours before baking to remove the chill.
Option 2: Same-Day Warm Proof Cover with a damp towel and proof at room temperature for 2-4 hours, until rolls are puffy and nearly touching each other.

The Poke Test: Gently poke a roll with your finger. If the indentation springs back slowly and leaves a small dimple, they’re perfectly proofed!

Baking Your Sourdough Dinner Rolls
Preheat your oven to 375°F (190°C). Gently brush the tops of your rolls with egg wash for that gorgeous golden color.

Bake for 18-22 minutes, until the tops are golden brown and the internal temperature reaches 190°F (88°C). When tapped on the bottom, the rolls should produce a hollow sound.


Cooling & Serving
Transfer rolls to a wire rack and let them cool for at least 10 minutes before serving. This cooling period ensures the interior crumb firms up correctly.

Serve warm with butter, jam, or alongside your favorite soup or stew. These rolls are incredible fresh from the oven but stay soft for days when stored properly.

Troubleshooting Common Sourdough Roll Problems

Dense Rolls: Usually caused by under-proofing, inactive starter, or insufficient kneading. Make sure your starter passes the float test and give the dough adequate time to rise.
Flat Rolls: Often the result of over-proofing or weak starter. Watch for the poke test and don’t let rolls proof too long.
Dry Rolls: Typically from overbaking or too much flour during kneading. Check internal temperature and avoid adding excess flour.
Not Tangy Enough: Short fermentation or young starter. Try the overnight cold proof method or use more mature starter.
Sticking to Pan: Always grease your pan well, and consider using parchment paper for extra insurance.
Sourdough Dinner Roll FAQs
Can I use sourdough discard? Yes! Use 150g of discard instead of 100g active starter, and add ¼ teaspoon active dry yeast to help with rising.
How long do they last? When stored in an airtight container at room temperature, fresh rolls remain soft for 3–4 days. Freeze for up to 3 months.
Can I freeze them? Absolutely! Freeze baked rolls in a freezer bag. Reheat directly from frozen at 350°F for 5-7 minutes.
What’s the best flour to use? Bread flour gives the best structure, but all-purpose flour works well too. Avoid whole wheat flour for this recipe as it can make rolls dense.
Can I add mix-ins? Yes! Try garlic and herbs, cheese, or even dried cranberries. Add about ¼ cup of mix-ins during the final mixing stage.
Variations & Serving Suggestions

Sweet Variations:
- Cinnamon sugar rolls: brush with butter and roll in cinnamon sugar before second proof
- Orange cranberry: add orange zest and dried cranberries
Savory Options:
- Garlic herb: mix minced garlic and fresh herbs into the dough
- Everything seasoning: sprinkle on top before baking
- Cheese rolls: fold in shredded cheese during shaping
Perfect Pairings: These rolls enhance almost any meal, whether it’s a cozy weeknight dinner or a festive holiday feast. They’re exceptional with hearty soups, roasted meats, or simply slathered with good butter and jam.

Tips for Sourdough Success
Know Your Starter: A healthy, active starter is the foundation of great sourdough baking. Keep it on a regular feeding schedule and learn to recognize when it’s at peak activity.
Precision Matters: A kitchen scale eliminates guesswork and ensures consistent results every time you bake.
Temperature Awareness: Cooler kitchens mean longer fermentation times, while warmer conditions speed things up. Learn to read your dough, not just the clock.
Trust Your Eyes: Visual cues are often more reliable than timing. Look for doubled size during bulk fermentation and the proper poke test results during final proofing.
Conclusion
There’s something magical about pulling a pan of golden, aromatic sourdough dinner rolls from your oven. The combination of that gentle tang, incredibly soft texture, and homemade satisfaction is simply unmatched. This recipe takes the guesswork out of sourdough baking while delivering bakery-quality results every single time.
Whether you’re planning a special dinner, want to elevate your weeknight meals, or simply crave the therapeutic process of bread baking, these rolls deliver on every level. The flexible timing means you can fit them into your schedule, and the detailed instructions ensure success even if you’re new to sourdough.
I’d love to hear about your baking adventures! Share your photos and variations in the comments below – seeing your beautiful homemade rolls always makes my day. And if you loved this recipe, be sure to check out our other sourdough favorites like our Classic Sourdough Bread and Sourdough Pizza Dough.
Happy baking, and here’s to filling your home with the incredible aroma of fresh sourdough dinner rolls!


