
There’s something magical about making pizza dough from scratch. The moment you pull that warm, golden crust from the oven—crispy on the outside, soft and chewy on the inside—you’ll wonder why you ever settled for store-bought. This homemade pizza dough recipe is incredibly versatile, perfect for Friday night pizza parties, casual weeknight dinners, or even meal prepping for the week ahead. What makes this recipe truly special is its simplicity and reliability. You don’t need fancy equipment or hard-to-find ingredients, just a few pantry staples and a little patience. The dough comes together in minutes, and while it does need time to rise, that hands-off period is when the magic happens—the yeast works its wonders, developing those beautiful air pockets and complex flavors that make homemade pizza so irresistible.
The aroma alone is worth the effort. As the dough rises, your kitchen fills with that distinctive yeasty scent that promises something delicious is on the way. When baked, the crust develops a subtle sweetness with hints of earthiness from the flour, while the texture strikes that perfect balance between substantial enough to hold your favorite toppings and light enough to leave you wanting another slice. Whether you’re topping it with classic marinara and mozzarella, going gourmet with prosciutto and arugula, or keeping it simple with olive oil and herbs, this dough is your blank canvas for pizza perfection.
Why You’ll Love This Recipe
- Foolproof and beginner-friendly – No special skills required, and it works every single time
- Budget-friendly – Costs just pennies per pizza compared to delivery or store-bought dough
- Incredibly versatile – Works for thin crust, thick crust, calzones, breadsticks, and more
- Make-ahead magic – Prep it days in advance and store it in the fridge or freezer
- Restaurant-quality results – Achieve that pizzeria-style crust right in your home oven
- Fun for the whole family – Kids love helping knead and shape their own personal pizzas
Ingredients Explained
Understanding what each ingredient does will help you become a better pizza maker and give you confidence to adjust the recipe to your preferences.
Flour forms the foundation of your dough, providing structure through gluten development. All-purpose flour works beautifully for a balanced texture, while bread flour creates a chewier, more robust crust due to its higher protein content. The protein in flour, when mixed with water and kneaded, forms gluten strands that give the dough its elasticity and strength.
Yeast is the living organism that makes your dough rise. As it feeds on the sugars in the flour, it produces carbon dioxide gas that creates all those wonderful air pockets in your crust. Active dry yeast and instant yeast both work well, though instant yeast can be mixed directly into dry ingredients without proofing.
Water hydrates the flour and activates the yeast. The temperature matters here—too hot and you’ll kill the yeast, too cold and it won’t activate properly. Lukewarm water (around 105-110°F) is ideal, feeling just slightly warm to the touch.
Sugar serves as food for the yeast, helping it activate faster and encouraging a better rise. It also adds a subtle sweetness to the crust and helps with browning during baking.
Salt is crucial for flavor development and also strengthens the gluten network, giving your dough better structure. Never skip it or add it directly to the yeast, as it can inhibit yeast activity.
Olive oil enriches the dough, making it more tender and adding flavor. It also helps create a golden, crispy exterior and keeps the dough from drying out during rising and baking.
Step-by-Step Tips
Getting perfect pizza dough is easier than you think when you follow these practical tips that address the most common challenges home cooks face.
Temperature is everything when working with yeast. Use a kitchen thermometer to check your water temperature if you’re unsure. If the water feels hot to the touch, it’s too hot. Aim for bathwater warm. If you accidentally use water that’s too hot, start over—there’s no saving yeast that’s been killed by heat.
Kneading develops the gluten, which gives your dough structure and chew. You’ll know you’ve kneaded enough when the dough transforms from shaggy and rough to smooth and elastic. The windowpane test is helpful here: stretch a small piece of dough between your fingers. If it stretches thin enough to see light through without tearing, you’re done kneading.
Don’t rush the rise. While it’s tempting to speed things along, a proper rise develops flavor and texture. If your kitchen is cold, place the dough in a turned-off oven with just the light on, or near a warm (not hot) stove. The dough should roughly double in size.
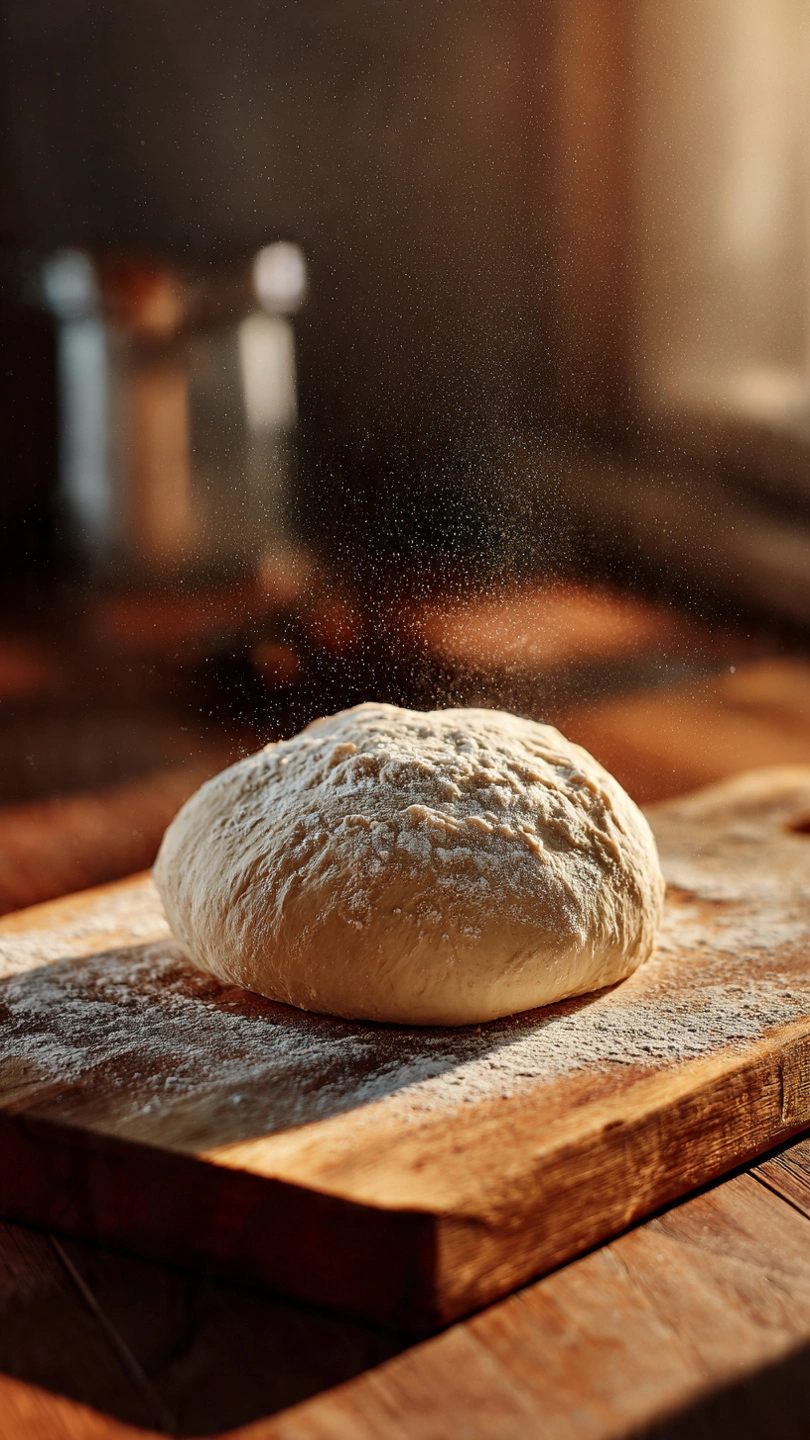
Flour your work surface generously when shaping to prevent sticking, but don’t overdo it or you’ll dry out the dough. A light dusting is all you need. If the dough keeps springing back when you’re stretching it, let it rest for 5-10 minutes to relax the gluten, then try again.
Let your shaped dough rest for 10-15 minutes before adding toppings. This brief rest makes it easier to work with and helps prevent shrinkage in the oven.
Preheat your oven thoroughly, ideally for at least 30 minutes at the highest temperature. If you have a pizza stone or steel, preheat that too. A blazing hot oven is the secret to achieving that crispy, charred crust you get at pizzerias.
Substitutions & Variations
This recipe is wonderfully adaptable to different dietary needs, preferences, and what you have on hand.
For the flour, you can substitute up to half of the all-purpose flour with whole wheat flour for a nuttier, heartier crust. Start with a 25% substitution if you’re new to whole wheat. You may need to add slightly more water as whole wheat flour absorbs more liquid. For a gluten-free version, use a 1:1 gluten-free flour blend, though the texture will be different and the dough won’t be as elastic.
Honey or maple syrup can replace the sugar in equal amounts, adding a subtle depth of flavor. You can also use a pinch of sugar substitute if you’re watching sugar intake, though the yeast may take slightly longer to activate.
Any neutral cooking oil works in place of olive oil—vegetable, canola, or avocado oil all work fine. For extra flavor, try using garlic-infused olive oil or adding herbs directly to the dough.
Herb and garlic variation: Add 2 teaspoons of dried Italian herbs, garlic powder, or fresh minced garlic directly to the flour mixture for an aromatic crust that’s delicious even without toppings.
Whole wheat pizza dough: Replace half the all-purpose flour with whole wheat flour and add an extra tablespoon of water and olive oil for a nutritious, slightly denser crust.
Thin crust: Divide the dough into three portions instead of two and roll it out very thin for a crispy, cracker-like base.
Thick crust or Detroit-style: Use the entire batch of dough for one large rectangular pan for a fluffy, focaccia-like crust with crispy edges.
Sourdough pizza dough: Replace the commercial yeast with sourdough starter for a tangy, complex flavor (you’ll need to adjust timing and proportions).
Storage & Reheating
One of the best things about homemade pizza dough is how well it stores, making it perfect for meal prep.
Refrigerator storage is ideal for short-term planning. After the first rise, punch down the dough, coat it lightly with oil, and place it in an airtight container or zip-top bag. It will keep in the refrigerator for up to 5 days. The cold fermentation actually improves the flavor, developing more complex, slightly tangy notes. When you’re ready to use it, let the dough sit at room temperature for 30-60 minutes before shaping—cold dough is difficult to stretch.
Freezing is perfect for long-term storage. Divide the dough into individual pizza portions, shape each into a ball, and wrap tightly in plastic wrap, then place in a freezer bag. Frozen dough keeps beautifully for up to 3 months. To use, transfer it to the refrigerator 24 hours before you plan to make pizza, then let it come to room temperature for easier shaping. You can also thaw it at room temperature for 2-3 hours if you’re short on time.
Pre-shaped dough can also be frozen. Roll out the dough, place it on parchment paper, and freeze until solid. Stack the frozen crusts with parchment between each layer and store in a freezer bag. These can go straight from freezer to oven—just add your toppings and bake, adding a few extra minutes to the cooking time.
Baked pizza stores in the refrigerator for 3-4 days in an airtight container. For the best reheating results, use a skillet on the stovetop over medium heat for 3-4 minutes to crisp up the bottom, or reheat in a 375°F oven for 8-10 minutes. Avoid the microwave if possible, as it makes the crust soggy and chewy in an unpleasant way.
Serving Ideas
While pizza is delicious on its own, pairing it with the right sides and drinks elevates your meal to restaurant quality.
Classic Italian sides complement pizza beautifully. A crisp Caesar salad with crunchy romaine, parmesan, and garlicky croutons cuts through the richness of cheesy pizza. A simple arugula salad dressed with lemon juice, olive oil, and shaved parmesan adds a peppery, fresh contrast. For something heartier, serve garlic knots, bruschetta, or antipasto skewers with olives, mozzarella, and salami.
Dipping sauces turn pizza night into an interactive experience. Set out small bowls of marinara, garlic butter, ranch dressing, hot honey, or balsamic glaze for crust dipping. Kids especially love having options.
Beverage pairings depend on your toppings and mood. A crisp Italian lager or wheat beer complements most pizzas without overwhelming them. Red wine drinkers should reach for a Chianti or Sangiovese with tomato-based pizzas, while white wine fans might enjoy a Pinot Grigio with lighter, veggie-topped pies. For non-alcoholic options, Italian sodas, sparkling lemonade, or even a classic Coke work wonderfully.
Make it a pizza bar by setting out various toppings and letting everyone build their own personal pizzas. Provide classics like pepperoni, mushrooms, bell peppers, and olives, plus some creative options like pineapple, jalapeños, or fresh basil. This approach is perfect for parties and accommodates different dietary preferences effortlessly.
FAQs
Can I make pizza dough without a stand mixer?
Absolutely! Pizza dough has been made by hand for centuries. Mix the ingredients in a large bowl until they come together, then turn the dough out onto a floured surface and knead by hand for 8-10 minutes. It’s a great arm workout and very satisfying. The dough is ready when it’s smooth, elastic, and springs back when poked.
Why isn’t my dough rising?
The most common culprit is yeast that’s either expired or was killed by water that was too hot. Check your yeast’s expiration date and make sure your water temperature is between 105-110°F. Cold kitchen temperatures can also slow down rising significantly. Try moving your dough to a warmer spot, like an oven with just the light on, or be patient and give it more time.
How do I know when my dough has risen enough?
Your dough should roughly double in size during the first rise. To test if it’s ready, gently press two fingers about half an inch into the dough. If the indentation remains and doesn’t spring back, it’s perfectly risen. If it springs back quickly, give it more time. If it deflates, you’ve let it rise too long, but it’s usually still usable.
Can I use this dough for other recipes besides pizza?
Yes! This versatile dough works wonderfully for calzones, stromboli, breadsticks, garlic knots, and even focaccia. You can also use it as a base for flatbreads or roll it out thin and use it to make crackers. The possibilities are endless, which is why it’s such a valuable recipe to master.
My dough is too sticky—what should I do?
Humidity and flour measurement variations can affect dough consistency. If your dough is tacky and sticking to everything, add flour one tablespoon at a time while kneading until it’s smooth and slightly tacky but manageable. However, slightly sticky dough is actually preferable to dry dough, which produces a tough crust. When in doubt, use less flour rather than more.
What’s the best way to get a crispy crust at home?
The secret is high heat and the right baking surface. Preheat your oven to its maximum temperature (usually 500-550°F) for at least 30 minutes. Use a pizza stone or steel if you have one, preheated along with the oven. Alternatively, preheat a heavy baking sheet upside down. These surfaces retain heat and transfer it directly to the bottom of the crust, creating that coveted crispy bottom. Don’t overload your pizza with wet toppings, as excess moisture creates steam and prevents crisping.
Print
The Best Homemade Pizza Dough
- Total Time: 1 hour 57 minutes
- Yield: 2 (12-inch) pizzas (8 servings) 1x
- Diet: Vegetarian
Description
This easy homemade pizza dough recipe creates the perfect crust every time—crispy on the outside, soft and chewy on the inside. With just 6 simple ingredients and minimal hands-on time, you’ll never buy store-bought dough again. Perfect for beginners!
Ingredients
- 3 ½ cups all-purpose flour (or bread flour)
- 1 packet (2 ¼ teaspoons) active dry yeast
- 2 teaspoons sugar
- 2 teaspoons salt
- 2 tablespoons olive oil
- 1 ½ cups warm water (105-110°F)
Instructions
- Activate the yeast: In a small bowl, combine warm water, sugar, and yeast. Stir gently and let sit for 5-10 minutes until foamy and bubbly.
- Mix the dough: In a large bowl (or stand mixer), combine flour and salt. Add the yeast mixture and olive oil. Mix until a shaggy dough forms.
- Knead: Turn dough onto a floured surface and knead for 8-10 minutes by hand (or 5-6 minutes in a stand mixer with dough hook) until smooth and elastic.
- First rise: Place dough in a lightly oiled bowl, turning to coat. Cover with a damp towel or plastic wrap. Let rise in a warm place for 1-2 hours until doubled in size.
- Shape: Punch down the dough and divide into 2 equal portions for two 12-inch pizzas. Shape into balls.
- Second rise: Let dough balls rest for 15-20 minutes, covered, before stretching.
- Stretch and shape: On a floured surface, stretch or roll each dough ball into a 12-inch circle. Transfer to a pizza peel or parchment paper.
- Add toppings and bake: Top as desired and bake at 475-500°F for 10-15 minutes until crust is golden and toppings are bubbly.
Notes
- Make ahead: Refrigerate dough for up to 5 days or freeze for up to 3 months.
- No stand mixer needed: This recipe works perfectly by hand.
- Flour options: Bread flour creates a chewier crust; all-purpose works great too.
- Thin crust variation: Divide dough into 3 portions instead of 2.
- Yeast check: If yeast doesn’t foam in step 1, start over with fresh yeast.
- For crispier crust: Preheat a pizza stone or baking sheet in the oven before baking.
- Prep Time: 15 minutes
- Cook Time: 12 minutes
- Category: Bread, Main Course
- Method: Baking
- Cuisine: Italian, American
Nutrition
- Serving Size: 1/8 of recipe (1 slice of 12-inch pizza crust, dough only without toppings)
- Calories: 215 kcal
- Sugar: 1g
- Sodium: 585mg
- Fat: 4g
- Saturated Fat: 0.5g
- Unsaturated Fat: 3g
- Trans Fat: 0g
- Carbohydrates: 39g
- Fiber: 1.5g
- Protein: 6g
- Cholesterol: 0mg